Flipdiscs (or flip dots) are a display type that utilizes electromagnetic pulses to flip a small disc between two colors. Despite being invented over 80 years ago, the underlying technology is mostly the same today. I chose them because I wanted to design a large interactive wall art for my office, and didn’t like the LED glow of traditional screens. Flip displays are an interesting alternative. They have high readability, a long lifespan, and achieves anywhere between 25-60fps. Also, as a pleasant bonus, they emit a sound like rain hitting a window each time one of the disc flips - I find it very soothing. I’ve always wanted unique ways to visualize code, like this pixel knitting app we designed for electroknit knitting machines or this crafting tool for Atom Editor (RIP). Flipdots seemed like a similar fun challenge. I paired with my partner to help code and design the board. Who doesn’t love quality hacking time with their partner?! I’m not sure how many people will find this useful since flipdisc displays are sort of an obscure technology, but here we go!
Contents
Build
Panels
We used 9 Alfazeta panels in a 3x3 grid or 84x42 discs. Each board has (2) 28x7 panels. You can see the measurments of the toal design in this diagram. The PCB features an older ATMEGA128 microcontroller, a couple hundred MELF diodes (be sure to buy extras, because they can pop off easily!) charlieplexed together, and two DIP switches. One DIP switch sets the address, and the other sets the baud rate. Find more information about the AlfaZeta boards, here is the manual.
It’s relatively difficult to source flipdisc boards or components, so your options are limited. If I were to do the project again, I would consider experimenting with designing my own board. These 7-segment flipdiscs also look really neat. Having access to the firmware would be a nice option when tuning performance. I also really wish I could’ve gone larger, but the expense of the panels really adds up fast. Unfortunately, right now, flipdiscs are more catered towards businesses (mostly the transportation industry) than the general consumer. Hopefully that changes.
Power
To power the board, it needs a total 24V 1A per board, or 9A total to send enough power to flip all the dots. We ended up using a 24V 10A Meanwell power supply. MEAN WELL HLG-240H-24
Frame
We built the frame using 80/20 aluminum extrusions, and screwed the PCB standoffs directly onto the frame. Word of caution: the boards and discs are incredibly fragile (My kids love to mess with them!) I read somewhere that flipdiscs are similar to butterfly wings, and I think that’s an appropriate analogy. It’s really easy to lose or break discs in the building process. Make sure to handle by the edges and carefully attach each board one-at-a-time. Here is a list of 80/20 parts that we purchased:
- (7) 1010 - cut to 25.2in
- (2) 1010 - cut to 49.65in
- (12) 33460 Corner Connector
- (72) M3x16MM screws
- (72) M3x10MM spacer
80/20 is really easy to assemble. I would also recommend the 10-series jig and bit for drilling mounting holes. We also built a wood frame out of birch. You could easily skip this part and just mount the 80/20 frame. Woodworking is beyond the scope of this article. Here are some photos of the final build.
Cabling
We connected each column in series, and then chained them all together. The data lines are +/- on the RS485 block terminal. We used 18AWG wire for the power lines and 22 AWG shielded cable for the data. It’s helpful to have some Wago Wire Lever Nuts for splicing and crimping terminals for the wire ends. If you want to achieve high framerates, make sure you’re using an RS485 line for no more than 6 panels. We used a total of 3 USB RS485 devices for the display. RS485 to ethernet servers are also great if you want to serve the content from an external server.
Depending on the type of board that you get, here are some tools and parts that I recommend:
- (18) 5.08mm Pitch Male Female PCB Screw Terminal Block
- (4) Wago 221 Wire Lever Nuts
- (72) Wire Ferrules
- Ferrule Crimping Tool
- Wire stripper
Processing
We’re using machine learning for processing voice, video, and images so needed a little bit more processing power than a basic single-board computer or microcontroller. We ended up using a Nvidia Orin Nano. A Raspberry Pi would likely work too, although the framerate may start to suffer. We paired the Nvidia board with an IMX708 camera and a Waveshare audio board for audio input/output. We created a Dockerfile for deploying on Jetson 6.0. Mediapipe has to be compiled from source to enable the GPU. If you’re looking for an easier route, I would recommend a M2 Mac Mini, or if you want to skip the interaction you can go with a much more inexpensive solution, like a Raspberry Pi.
Software
Board
Communication is over RS485. Each frame starts with a start byte [0x80], followed by either flush [0x83] or buffer [0x84], then the address of your board, then your image data, finally followed by an end byte [0x8F]. Image data is really easy since we only have two states [0, 1]. It also uses RLE for compressing each frame it sends over the wire. We created a basic library for using flipdisc screens in Node.js. It currently works with AlfaZeta and Hanover boards over USB and ethernet. Github. You can send data directly from a canvas instance using ctx.getImageData(0, 0, width, height), and it’ll cast the pixel data to either 1 or 0 based on luminance. Here is an example of how it works:
import { createDisplay } from 'flipdisc'

const path = '/dev/tty0'
const display = createDisplay([[1], [2]], path)

display.send(frameData)
npm install flipdisc
We wanted to build something that could run real-time visualations with direct user feedback. This is unlike other low-pixel displays that pre-render assets to display on low-powered devices e.g. Pixlet from tidbyt. We knew we wanted to utilize webgl/canvas. There was no reason to re-invent the wheel with rendering libraries, so we’re leveraging existing web tech that we’ve found to work well - PIXI for general 2D rendering, Three.js for 3D rendering, Matter.js for physics engine, and GSAP for animations. We also utilize node-canvas, and node-gl for server-side rendering.
For interactions, we’re using Google’s fantastic MediaPipe libraries and models. For a quick demo, check of their example of Gesture Recognizing. Since many ML libraries use python, we spawn python scripts from node to run most of the ML specific code, and then send the data back via ZeroMQ IPC. Maybe we’ll use Python WASM in the future.
Here is an example of using the Gesture Recognizer in this project:
  const e = new GestureEmitter()
  scene.add(e)

  e.on('move', data => {
    if (data.gesture[0] == 'Open_Palm') {
      ball.position = data.position;
    }
  })
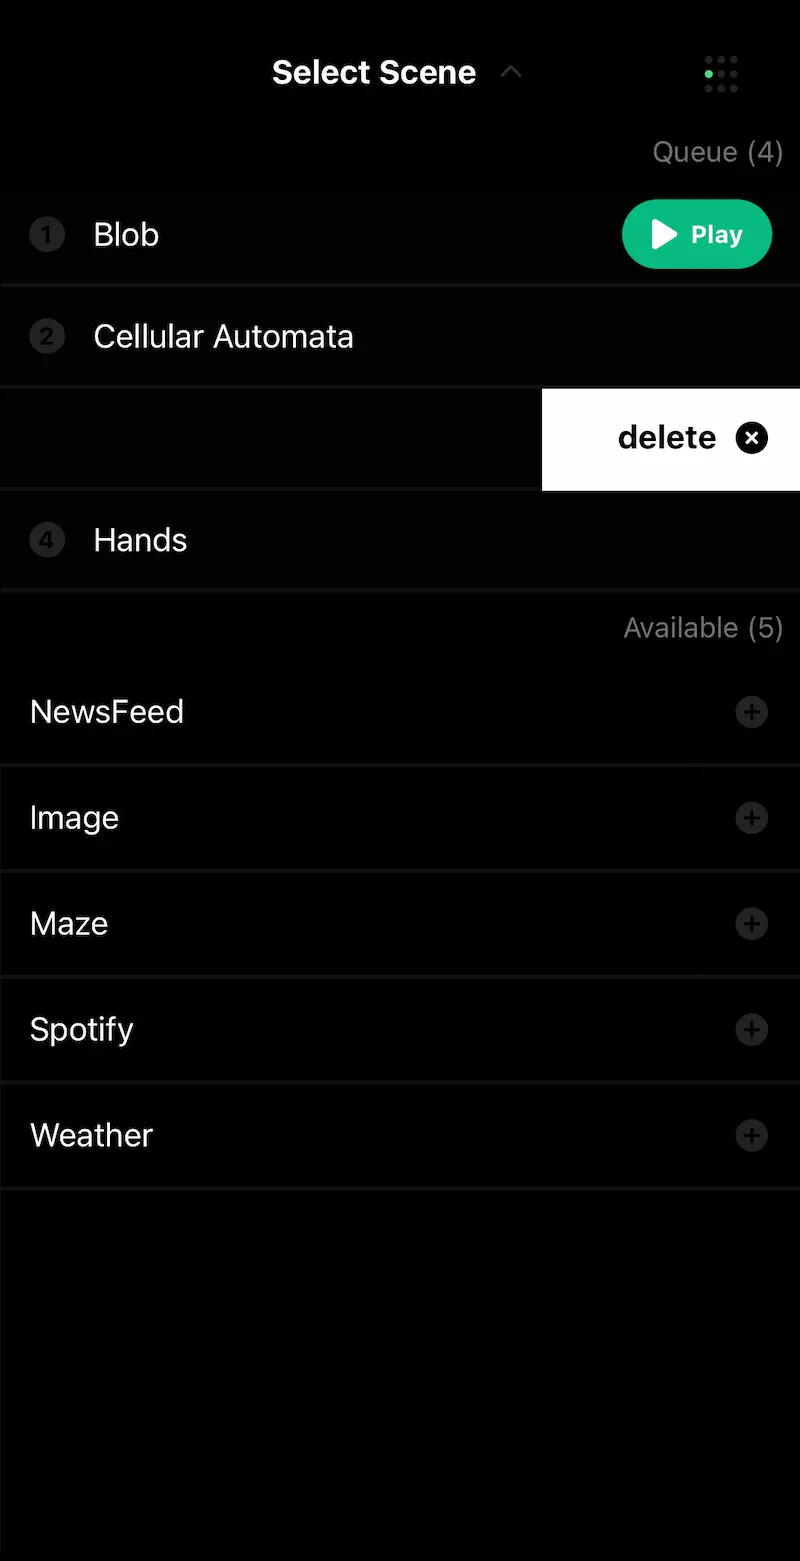
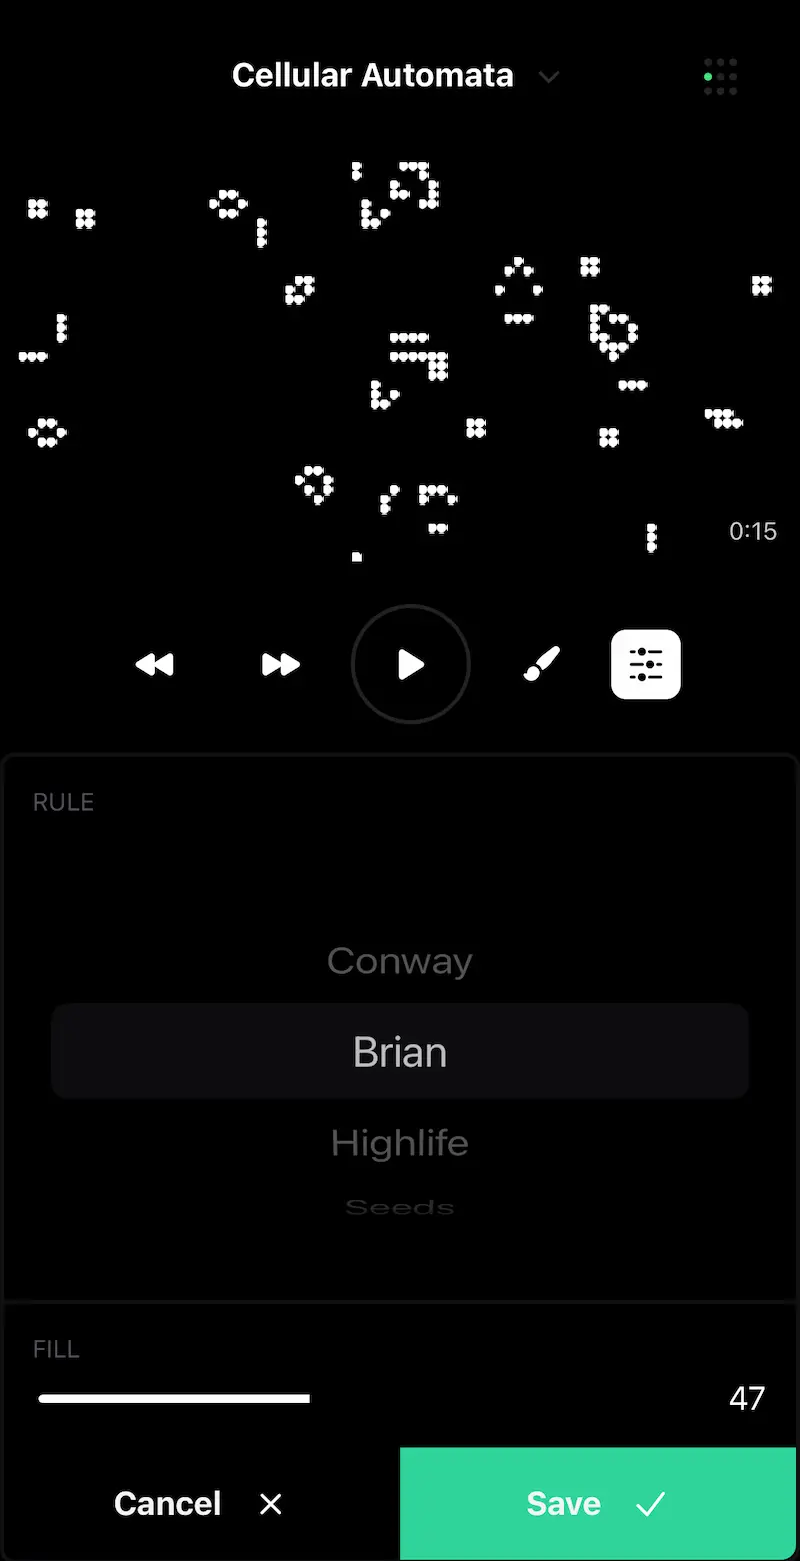
We created many different visualisations that can be toggled and customized on-demand. Each of these visualizations is represented as a scene and can be added to a queue. Playing a scene or managing the queue is accessible by a REST API. The live playing data is sent over websockets. Building a scene is straightforward. You can subscribe to events or add to the rendering queue with the useLoop function. Each scene file has to return both a scene and a schema and, optionally, a background task. A background task will run at a set interval, and if it returns successfully it’ll add a scene to the queue to play.
Server Documentation | Scene Examples
npm install flipdisc-server
Here is an example of a basic scene that shows an image.
import { createScene, ImageView } from 'flipdisc-server'

const schema = {
  title: 'Image',
  properties: {
    url: {
      type: 'string',
      default: 'image.png',
    },
  }
}

const image = function(opts) {
  const scene = createScene()
  scene.once('loaded', () => {
    const img = new ImageView(opts.url)
    scene.add(img)
  })

  return scene;
}


export { image as scene, schema }
Here is a bit more of what the library helps take care of:
- A way to import scenes from a directory
- Live reload on scene files
- Background tasks that add a scene to the queue
- Easy UI components for text, images, lists, etc
- Flex layout based on Yoga.
- Basic getters and setup for pixi/three/matter as well as ability to add additional modules
- REST server and websocket for live data
- Easy way to use rendering loops, or GLSL shaders
Interface
I’ve built many projects in the past that become unusable because I no longer remember which command to run, or how to operate it. So, we wanted to make sure to build a reliable interface for the display. We settled on an expo app since it was the quickest way to prototype. As much as I love native apps, I cringe whenever I have to open Xcode. You can control all aspects of the display from the app - pause, start, skip, previous. You can configure scene variables to personalize the experience. You can also freehand draw right on the screen. Download it on the App Store. Here are some screenshots from the app:
A few of the features are:
- Pause/play a scene
- Add or remove from queue
- Skip or previous in queue
- Watch live screen of what’s being shown on display
- Freehand draw on screen
- Send configuration variables to each scene
Design
Subspace was one of the first multiplayer games I played as a kid. The game allowed you to have a tiny 12x8 banner that you could design that would appear right next to your ship. I was blown away by what people could create with such limited space. I was soon hooked on designing my own. There was something about the strict limitation of pixels that lent itself to pushing creativity even further - you wanted to see how far you could push the medium. It’s easy to take for granted the sheer number of pixels we have at our disposal when working on the web. Being forced to distill things into the simplest information that you can convey is sometimes a blessing because you have to be very conscious and deliberate with the decisions you make. The 42x84 size of the flipdisc display felt like a similar exercise in constraints.
The basic readable font that we use is a tiny 3x5 pixel font. There is also 4x5 and mono variants. If you want to go even smaller, there are 3x3 fonts and 3x4 nano fonts, but I feel like they lose too much legibility to be usable in practice. Anything over 12 pixels you can use most fonts with maintaining some legibility. Bitmap fonts are really great for these types of displays - especially since any anti-aliasing isn’t rendered. There are some really interesting archives of Bitmap designed fonts that could be fun to integrate.
For images, we use a mixture of Floyd-Steinberg dithering and Bayer 4x4 ordered dithering. Below is an example that shows the difference in the two techniques. I prefer Floyd-Steinberg on images since it has a more natural pixel distribution, and Bayer on UI elements since it produces a consistent pattern. If you’re curious to learn more, here is a fantastic article on the subject - Ditherpunk — The article I wish I had about monochrome image dithering
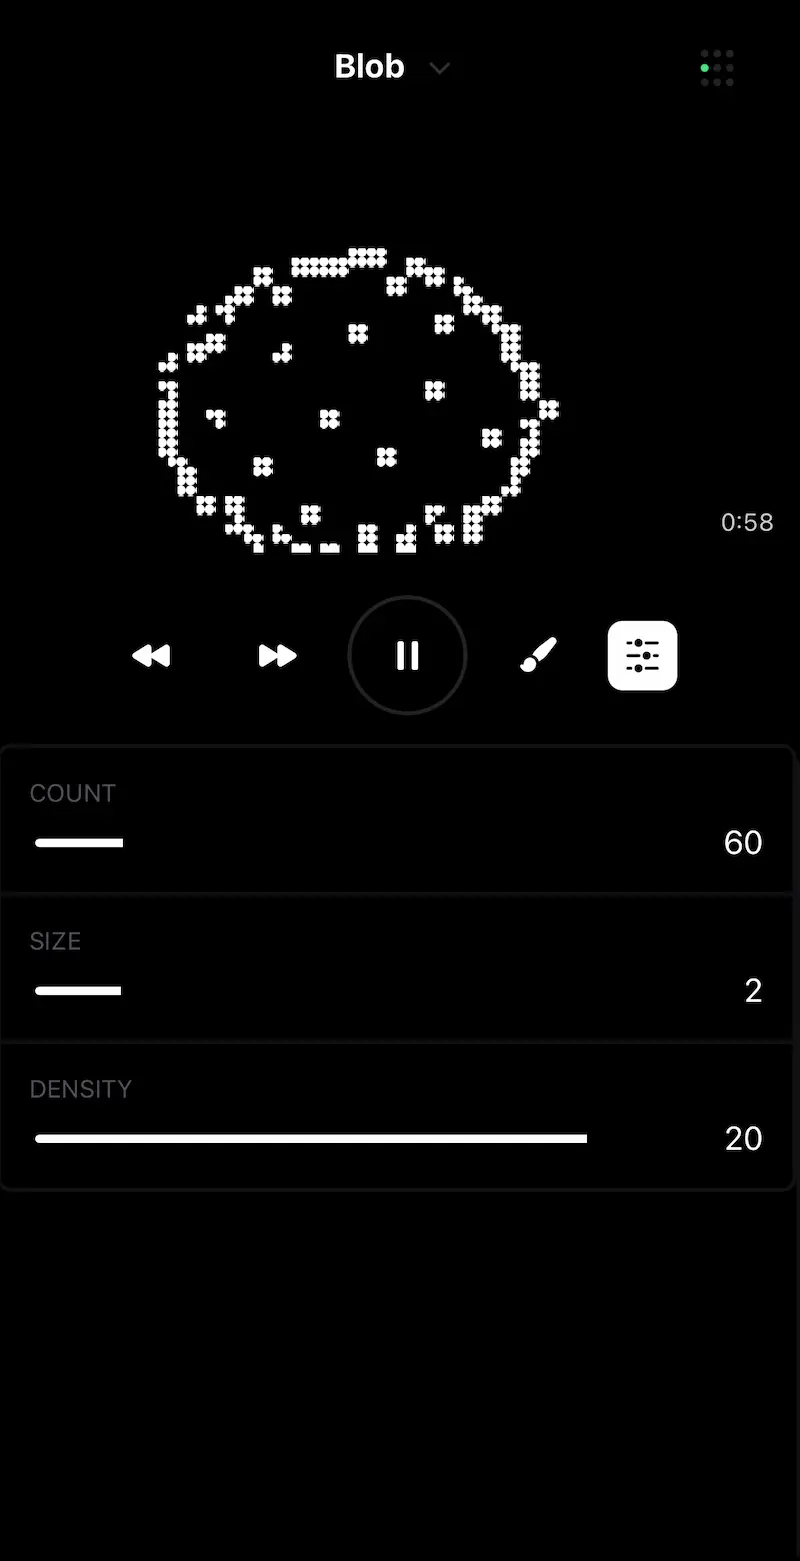
Finally, below are some of the scenes that we designed for my office. They include a New York Times RSS reader, a Spotify client, a weather app, and many more. We’ll probably expand on this list as I figure out which stuff I want to casually glance at as I work.
Next Steps: AI Wall
Our goal is to make a transparent agent interface to AI utilizing new multi-modal input/output. Since a lot of these capabilities are right around the corner, we’re waiting on next-gen models to be released before pursusing this functionality.
Conclusion
I really had a fun time colaborating on this project. I do hope that flipdiscs become more accessible for hobbyists. If anyone wants to collaborate on new affordable flipdisc hardware, let me know! And, if you have any questions about how to build your own feel free to reach out.